How to Create Your Own Aesthetic Digital Mood Board!
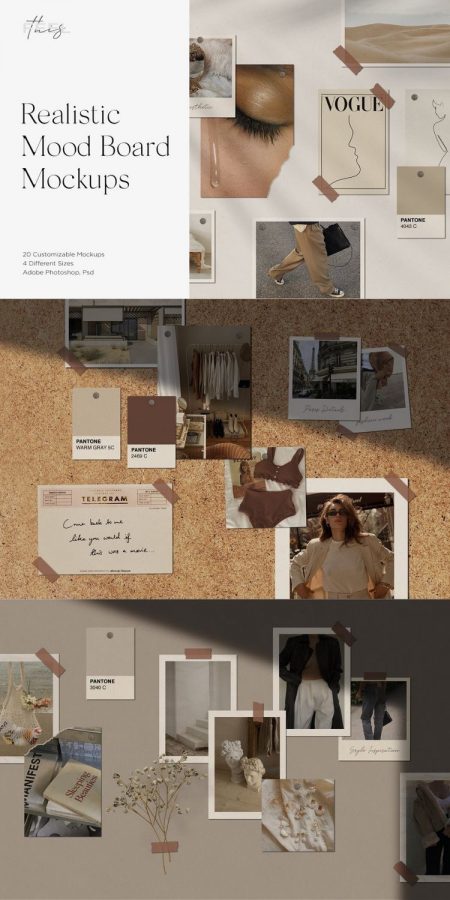
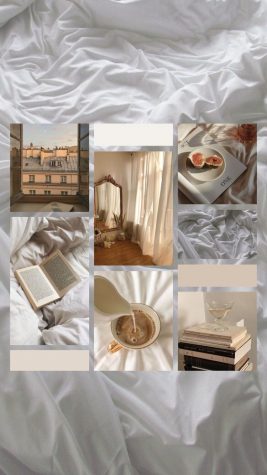
Photo courtesy of Creative Market.
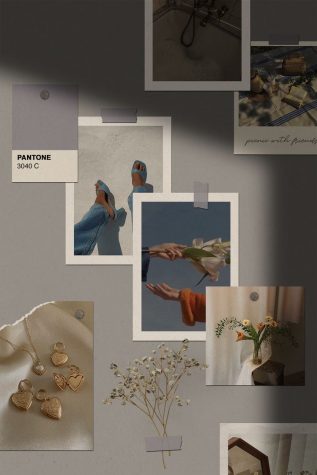
Mood boards have taken the world by storm as many attempt to bring order and style to their life in this world of chaos. The versatility of mood boards attracts the lots as it can be used for past memories, present tasks, and future goals or portraying a certain aesthetic or core. Regardless of the type of mood board that you want, the process of making one is the same! The idea of creating your own can seem daunting, but before you know it, you will be a master! Come join me as I show you some tips and tricks to aid you on your journey.
Step 1: Seek Inspiration!
The cliche that you can find inspiration anywhere is absolutely true! Inspiration can strike when you’re listening to your new favorite song, watching the rain fall, etc. I can vouch for the first situation as it happened to me! I was listening to “She’s In The Rain” by The Rose, when I was inspired to create a mood board based on the vision I saw while listening to the song! If you are having trouble deciding on a topic, I have two suggestions. First, go to Pinterest and look at existing mood boards and see what catches your eye. Then try to categorize that into one general mood. Remember to not be super specific! Lastly, take that mood and add your own spin to it! The second thing you can do is to think about what you already like and how you can categorize one of your likes into a mood. An interesting concept could be creating a mood board based on all your likes and quirks and then showcasing yourself through that board. You should now have a general idea of the ambience of your board.
Step 2: Gather Images!
Go on Pinterest, Google Images, or any picture website/app and gather pictures that fit the aura that you’re going for. Get as many pictures as you can to give you a lot of options.
Step 3: Sort Through Your Images!
Look through your pictures and try to find similarities between them. You might be reading this with a quizzical expression, because aren’t all the pictures representing the same mood? Yes, they are, but there can be a large spectrum in a single mood as well. In order to increase the amount of cohesion and neatness in your board, you have to find pictures with a similar color tone, such as warm or cool, or any similarity at all, so they won’t clash.
Step #4: Assembling the Board!
Use any software or app that allows you to assembly pictures and add various elements. My personal favorite is Canva, so I will be explaining how to use Canva to create your board. The steps should be applicable to other apps as well.
4a. Go to “Create a Design” and select whichever you want. The label doesn’t matter, but the dimensions do. I personally use instagram post, or 1080 x 1080 px) as it gives you a large space to work with.
4b. You can either add a collage template or free hand your board. I would recommend starting with a collage template to dip your feet into the water, but if you want to start with free-hand, go ahead! I prefer free-hand as it gives you more creative freedom.
4c. Upload your images into the uploads area.
4d. If you are using the collage template, drag your images into whatever section you like. You can crop the images in the section or zoom in/out. If you are free-handing, then drag over your pictures and place them wherever you like.
4e. The following step is more applicable for free-hand. Stack the pictures to add some fun visual tricks. You can move the pictures to the front or back to add to the stacked effect.
4f. Add various elements to make the board come to life. These can be found under elements on Canva. Some elements that you could add are pieces of tape, flowers, lyrics/words, etc.
4g. Change the background to remove any white space if it takes away from the mood of the board. This is usually done more with free-hand.
Step #5: Save and Share!
Save your board and share it with your family and friends or on social media. I would consider printing out your board and adding it to your room as a piece of decor that is entirely your own!
Congratulations! You have learned how to create your own mood board. You should be very proud of yourself, as you have taken the first steps toward mastering this art. The process might seem a bit tedious at times, but the result is always worth it! I always lose track of time while making mood boards, but my mood is constantly uplifted throughout the process and even higher once I’m done! I hope you feel the same when you officially partake on your journey. Remember to have fun and continue experimenting, Knights! Have a great day and don’t forget to strive for the impossible and be extraordinary.